


Apple’s annual Worldwide Developers Conference is in full swing. But we’re still reeling from some recent Apple news: Apple finally completed a multi-year plan to provide parts and repair resources for its major computer product lines. On May 29th, the iPad joined the self-service repair program. The documents released confirm what we’ve known all along: iPad repairs are a nightmare.
While we greatly appreciate Apple providing all these resources, we have to laugh at the sneaky way the news was announced. The press release, released on Wednesday, May 28th, announced that the iPad repair program would begin “tomorrow,” the 29th. Why? So that news outlets could happily reprint the story without focusing on the awful iPad repair process, even though it’s well documented by the very people who designed and built it. News reports about iPad repairs won’t include part prices or any of the tedious details.
Let’s see what “tomorrow” actually brings.
47-step plan
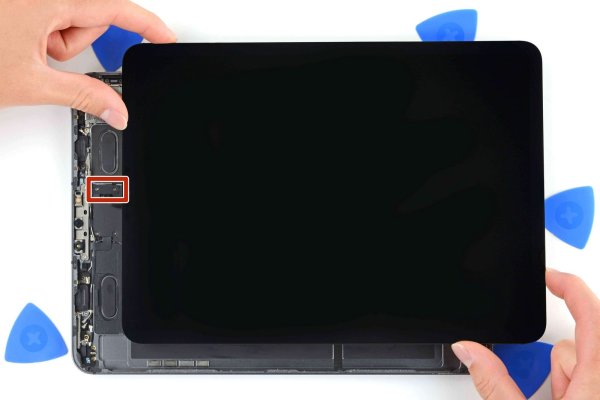
Just the thought of repairing an iPad can make even the most seasoned repair engineer’s hair stand on end. To understand the magnitude of the problem, let’s first consider iPad screen removal. This step is almost always necessary, as the screen is the only way to disassemble the iPad.
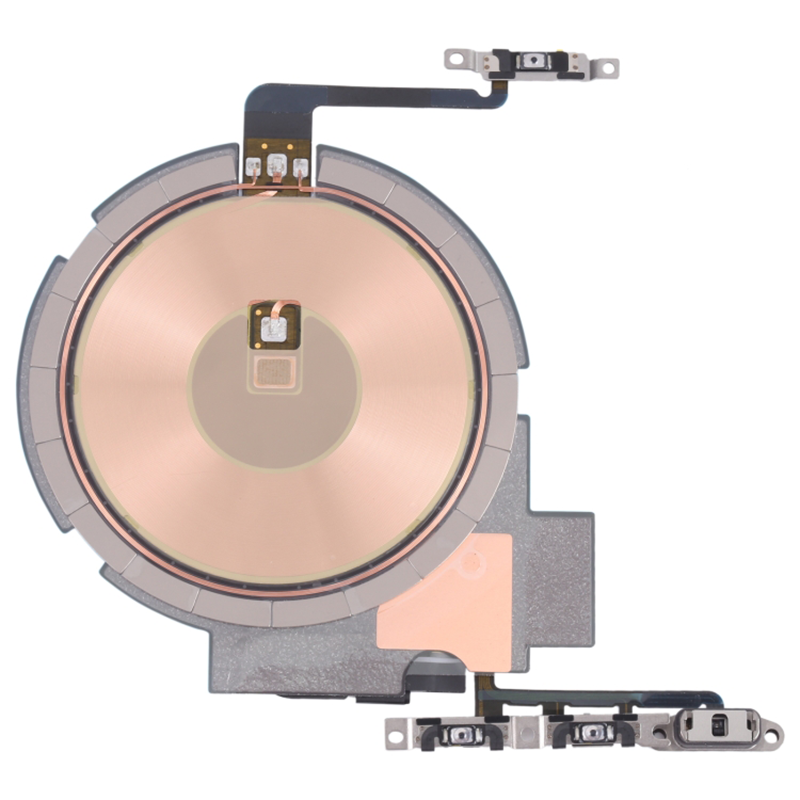
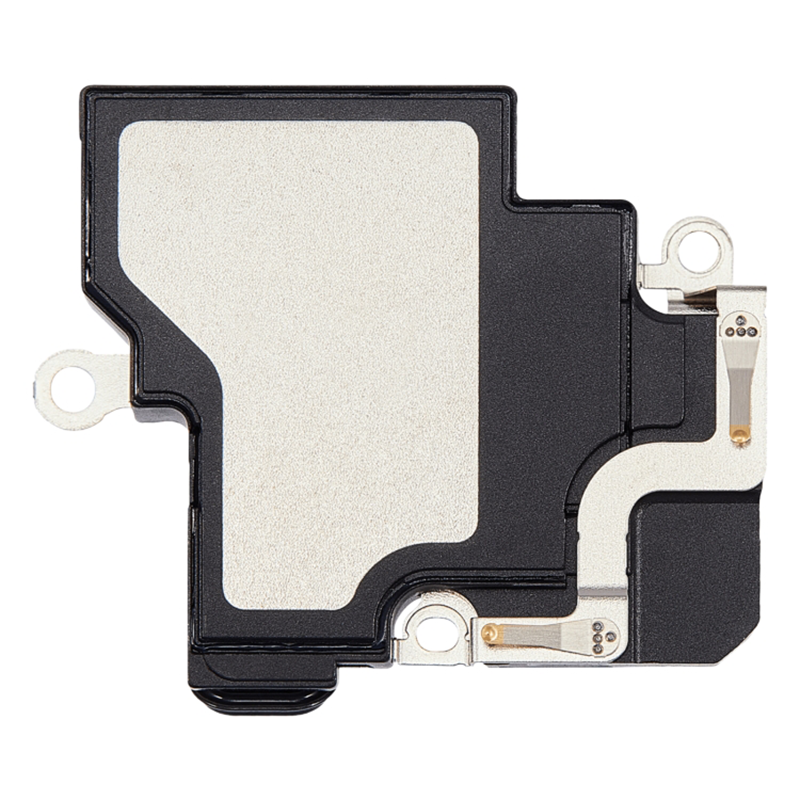
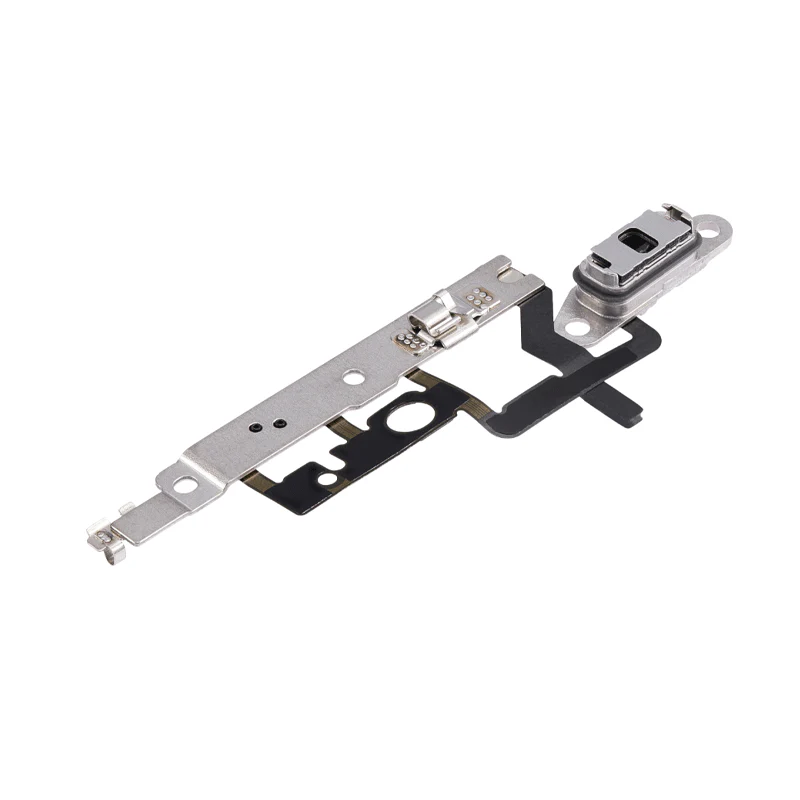
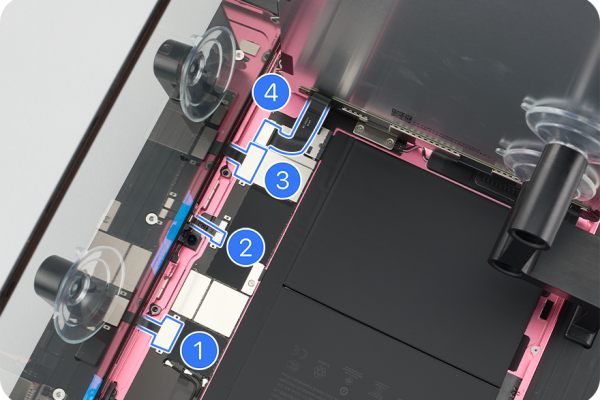
For comparison, let’s look at a professional repair engineer’s guide to removing the screen of a third-generation iPad Pro 11-inch. This guide requires 47 steps and follows a similar procedure to the latest entry-level iPad (we don’t have a guide for the latest base model iPad, but their removal is just as painful). First, you soften the screen adhesive, then gently partially loosen it to access the cables that need to be disconnected before you can release the screen. In the process, you’ll be dealing with screws, a lot of glue and tape, and you’ll have to remove (and then replace) numerous sensors, cameras, shielding, and, of course, cables. Lots and lots of cables.

Some steps require heat to soften the glue. Even after that, you’ll still need to use tape and adhesive to reattach the components. Be careful with the glue. Our guide included a warning: “Apply adhesive only to the edges of the sensor. Applying adhesive to the front of the sensor will damage it.”
If you’re replacing a cracked screen, the pressure is less (though you’ll need to tape the screen to minimize debris and provide a clean surface for suction cups). But if you’re just replacing the battery, you must ensure the screen is removed completely, or you’ll have to order a new one. In this case, removing the screen is like removing the battery cover. That’s crazy!
We don’t want to scare you away from this repair. With patience, the right tools, and a detailed step-by-step guide (the latter two of which we’ve already covered), it’s completely doable. However, it’s much more challenging than replacing consumable parts.
The Apple Way
So, how do Apple’s guides compare? Well, they’re excellent, as you’d expect from a manufacturer. But there are no insider tips or shortcuts. In fact, Apple’s guidelines require the use of some pretty esoteric tools to get the job done.
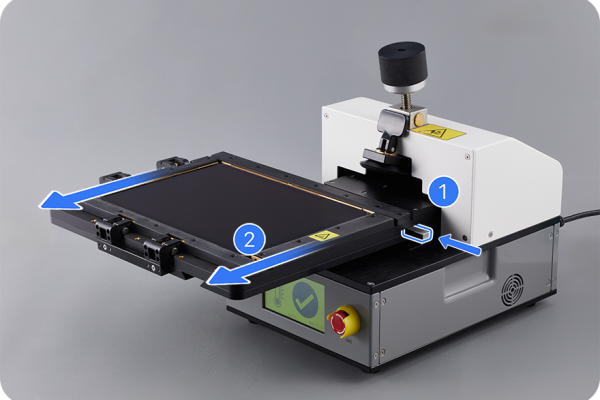

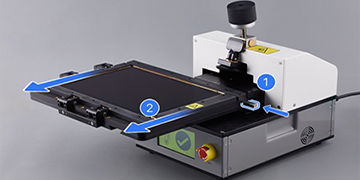
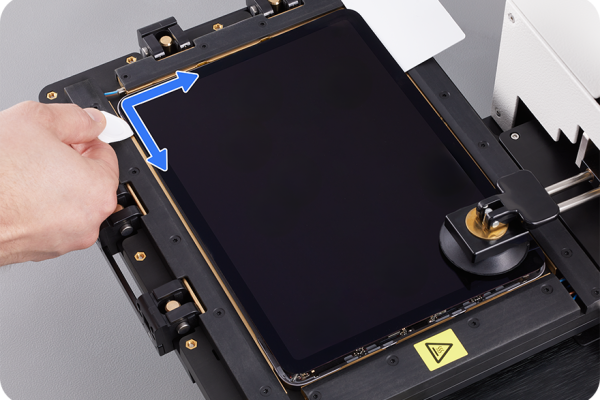
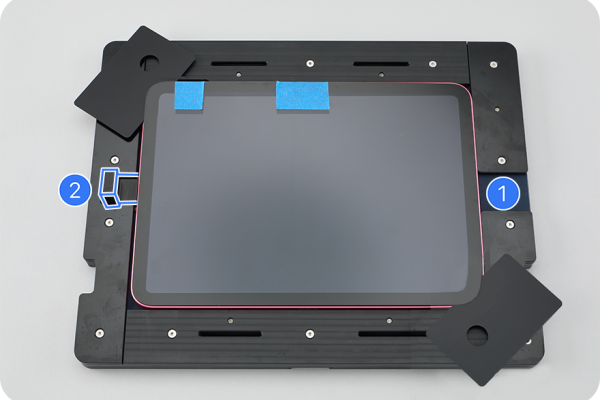
For example, the entire iPad repair process takes place in a custom jig called a “repair tray.” This tray then fits into a heated display holder, after which the “first step” of screen removal involves placing the entire assembly into another machine—a heated display removal jig.
The iPad repair tray looks fantastic. It’s equipped with suction cups to hold the cover glass and display while you work on the cables and sensors, and to realign them during reassembly. This provides a glimpse behind the scenes of an Apple Store repair shop, and while it’s well-equipped and well-functioning, purchasing all the necessary equipment might be difficult for an independent repair shop (the heated display holder alone costs $1,450).
For home repairs, you can rent tools from Apple (for the iPad, you get two boxes full of them), which is nice, but seriously, who actually does that besides tech journalists writing about this kind of stuff or professional teardown experts ordering the tools to see what’s going on inside?
As we mentioned, there are no shortcuts. You still need to remove all of these parts and then reinstall them later. Apple’s iPad battery replacement guide looks simple, requiring only six steps. And it is. However, these six steps don’t include removing the cover glass and display, which requires another 32 steps. Technically, this is fewer steps than our guide, but that’s because we’ve broken it down into more steps to help you follow along more clearly (for example, we have nine steps to guide you through adhesive removal).
As we said, we’re pleased to see Apple’s repair program progressing smoothly. While progress has been slow, when the parts, tools, and guides arrive, they arrive intact and assembled perfectly. This is truly a typical Apple product. Despite this, the iPad remains incredibly difficult to repair, perhaps the most challenging of all Apple products (excluding disposable devices like the AirPods Pro).
Part of the reason lies in its form factor. Ultra-thin tablets are difficult to make durable without extensive adhesives and tightly packed components. But part of the reason lies in design. The MacBook Air is also thin, yet its battery is easily accessible. The iPhone is smaller than the iPad and packs more technology, yet Apple has managed to make repairs increasingly simple over the years. Replacing the iPad’s battery should be much simpler.
People keep iPads for much longer than their phones, and replacing the battery is simply part of routine maintenance. Yet, Apple has so far shown little regard for this. When it comes to Apple’s environmental credentials, you could rank the iPad’s repairability alongside Apple Intelligence as an “E,” because “E” stands for “embarrassing.”